Wednesday, October 31, 2012

Add Adsense in the Middle of the Post


Yesterday we give you a tutorial that how to add adsense codes in the left side, right side, or in center of the post which could increase your adsense CTR and but as from the many times some websites OR some blogs put their adsense in the middle of the posts, that is also increase the CTR of your adsense earning.


Read Also-   Adsense Unit Placing Pack

3. Add Adsense in the Middle of the Post


Add Adsense in the Middle of the Post

  • Login to Blogger > Dashborad
  • Click on Drop Down Menu and select Template
  • Backup your Template before making any changes to your blog
  • Now Click on Edit HTML > Proceed > Expand Widget Templates
  • Press Ctrl + F and search the code shown below.

<data:post.body/> 

You will find two times <data:post.body/> code and You have to Replace it With the Second One

  • Now replace that code with below code.

<div expr:id='&quot;aim1&quot; + data:post.id'/>
<div style='clear:both; margin:10px 0'>

Your Adsense Code Here

</div>
<div expr:id='&quot;aim2&quot; + data:post.id'>
<data:post.body/>
</div>
<script type='text/javascript'>
var obj0=document.getElementById(&quot;aim1<data:post.id/>&quot;);var obj1=document.getElementById(&quot;aim2<data:post.id/>&quot;);var s=obj1.innerHTML;var t=s.substr(0,s.length/2);var r=t.lastIndexOf(&quot;&quot;);if(r&gt;0){obj0.innerHTML=s.substr(0,r);obj1.innerHTML=s.substr(r+1)}
</script>


You Have to first Convert the Adsense Code into the Compartible Form


  • Now just replace Your Adsense Code Here with your Own Asense Codes.
  • Now Save Your template.


If Any Problem Comes, Ask in Comments


Tuesday, October 30, 2012

Add Adsense ADS BELOW POST TITLE in LEFT RIGHT CENTER SIDE


Placing the Google Adsense is very important for better CTR and it's very helpful to increase the rate of earning when you put your ads in the right places the then you have more change to earn more money from Google Adsense Program and not only from the Google Adsense but also from the alternatives of Adsense program.

They also give the same result like Google Adsense Program.


Read Also- Adsense Unit Placing Pack

2. Add Adsense ADS BELOW POST TITLE in LEFT RIGHT CENTER SIDE


Put Adsense Below Post Tile

  • Login to Blogger > Dashborad
  • Click on Drop Down Menu and select Template
  • Backup your Template before making any changes to your blog
  • Now Click on Edit HTML > Proceed > Expand Widget Templates
  • Press Ctrl + F and search the code shown below.

<data:post.body/>


  • Now Paste the Code Shown Below just above/before it


Show Adsense in Left Side

If you want to show your Google Adsense ad below post tile in blogger in the left side then copy the code shown below


<div style="float: left; margin: 10px 10px 10px 0;">
YOUR ADSENSE CODE HERE
</div>


Show Adsense in Right Side

If you want to show your Google Adsense ad below post tile in blogger in the right side then copy the code shown below

<div style="float: right; margin: 10px 0px 10px 10px;">
YOUR ADSENSE CODE HERE
</div>


Show Adsense in Center

If you want to show your Google Adsense ad below post tile in blogger in the center then copy the below code

<div style="text-align: center; margin: 10px 0 10px 0;">
YOUR ADSENSE CODE HERE
</div>


You Have to first Convert the Adsense Code into the Compartible Form


Make Changes....!


  • Replace YOUR ADSENSE CODE HERE with your converted code.


If Any Problem Comes, Ask in Comments

Monday, October 29, 2012

Social Bookmarking Buttons Beside Adsense Ad


As many times you probability see in pro websites OR in pro blogs that Adsense always look below the header and beside the adsense unit you will see some social bookmarking buttons.


This tutorial will allow to do this without any cost be'coz i have saw that some kinds people charge money for it but you can do this without any cost.


Read Also- Adsense Unit Placing Pack

1. Social Bookmarking Buttons Beside Adsense Ad


It includes two parts.

      1. Generate Code from Generator.
      2. Paste that Code in Template.


Installation 1st Part (Generate Codes)

  • Copy your 336 x 228 OR 300 x 250 adsense code.
  • Paste in below Generator.
  • Click on Generate button.


Installation 2nd Part (Paste Code in Templates)

  • Login to Blogger > Dashborad
  • Click on Drop Down Menu and select Template
  • Backup your Template before making any changes to your blog
  • Now Click on Edit HTML > Proceed > Expand Widget Templates
  • Press Ctrl + F and search the code shown below.  

 ]]></b:skin>

  • Copy that CSS codes from generators and Paste just above ]]></b:skin>
  • Now again Press Ctrl + F and search the code shown below. 
<data:post.body/>

  •  and, Copy that HTML codes from generators and Paste just above <data:post.body/>
  • Save Your Template say bingo and You are done.


If Any Problem Comes, Ask in Comments

How to Remove Subscribe to Posts Atom from Blogger


Some times when we create a blog and post anything then we saw a text at bottom of the post Subscribe to Posts Atom from Blogger and many blog owners wants to remove it OR hide it from blogger. As we know many bloggers have been published this tutorial but we also post because visitors can easily solve their problem. It's very easy you just have to remove a single line from your blogger template.


Follow the Steps....!

  • Login to Blogger > Dashborad
  • Click on Drop Down Menu and select Template
  • Backup your Template before making any changes to your blog
  • Now Click on Edit HTML > Proceed > Expand Widget Templates
  • Press Ctrl + F and search the code shown below.

<b:include data='feedLinks' name='feedLinksBody'/>

  •  Now, Delete this line.
  • Save your template and you are done.


If Any Problem Comes, Ask in Comments

Sunday, October 28, 2012

Download Windows 8 Full Version


As you all know that recently the Windows 8 has been launched by Microsoft and every wants to use it as soon as possible but now you can easily use it in free with full version, you can easily take experience of Windows 8 and to know about Windows 8 and easily feel the difference about the Windows 7 and Upgraded Windowss 8 you will know easily about it that how it works with different software platforms.


Available Versions 

  • Windows 8 has 32 bit Version and 64 bit Version.


 System Requirements

  • Processor- 1 Ghz minimum processor
  • RAM -1 GB for 32 bit and 2 GB for 64 bit Version minimum
  • Harddisk- 16 GB for 32 bit and 20 GB for 64 bit Version minimum


 Download Windows 8 Totally Free Free


Product Keys of Windows 8

TK8TP-9JN6P-7X7WW-RFFTV-B7QPF

DNJXJ-7XBW8-2378T-X22TX-BKG7J

MBFBV-W3DP2-2MVKN-PJCQD-KKTF7

6RH4V-HNTWC-JQKG8-RFR3R-36498

4Y8N3-H7MMW-C76VJ-YD3XV-MBDKV

28VNV-HF42G-K2WM9-JXRJQ-2WBQW


Tips How to Use Windows 8 

  • Download the  Windows 8 first.
  • then, Enter the product keys
  • and your Window will be activate in full version.


Feel Free To Ask Any Thing

Add Borders to the Images in Blogger Post


When we upload OR add any image in blogger, shows a very simple without and borders but when we add the borders in our images then our team also think that we should also give a post about the borders for the images and then we create a new border style for images in blogger. This border style includes the bottom standing shadow below of image and little round corner as you can see in live demo.


Add Border in Images

  • Login to Blogger > Dashborad
  • Click on Drop Down Menu and select Template
  • Backup your Template before making any changes to your blog
  • Now Click on Edit HTML > Proceed > Expand Widget Templates
  • Press Ctrl + F and search the code shown below. 
]]></b:skin>

  •  Paste below code just above it.
.post-body img {
padding: 4px;
border: 1px solid #AAA;
background-color: #F0F0F0;
-webkit-border-radius: 3px;
-moz-border-radius: 3px;
border-radius: 3px;
-webkit-box-shadow: 0 15px 10px -12px black;
-moz-box-shadow: 0 15px 10px -12px black;
box-shadow: 0 15px 10px -12px black;
}

  • Save your template and you are done.


If any Problem Comes,  Ask in Comments


Saturday, October 27, 2012

How to Remove No Post from Bloggger


When you don't post anything in your blog then blogger shows a message that No Post and many bloggers designed their blog as they don't want to show posts in home page so they don't post anything but blogger shows a message   No Post and they want to disable it OR remove it. So, you can do it very easily by adding some 3 line codes of CSS.


Remove No Post from Blogger

  • Login to Blogger > Dashborad
  • Click on Drop Down Menu and select Template
  • Backup your Template before making any changes to your blog
  • Now Click on Edit HTML > Proceed > Expand Widget Templates
  • Press Ctrl + F and search the code shown below.   

]]></b:skin>

  • Paste below code before ]]></b:skin>

    /*---Remove No Post by widgetgenerators.blogspot.com----*/
          .status-msg-wrap
          {
          display: none;
          }
    /*---Remove No Post by widgetgenerators.blogspot.com----*/

    •  Save Your Template


    If Any Problem Comes, Ask In Comments

    Friday, October 26, 2012

    Google Apps in Windows 8


    As today Windows 8 has been launched with it's new features and microsoft given a app store there and you can easily download your favorite application from there.

    When Microsoft launched their Window 8 then Google also announced their some of the application for new Microsoft app store and you can easily download the Google's application from there like Google Search, Google Chrome and many apps of Google.

     The Google Search Application comes with  a clean and recognizable user interface.


    As Google Said.....

    If you’ve moved to Windows 8 and are getting acquainted with it, you may be looking for a couple of your favorite Google products that you use every day. To help you get the best experience possible on Google and across the web, we’ve designed and built a new Google Search app and Chrome browser for Windows 8 and created a simple site to help you get your Google back.


    View Google Back with Windows 8


    Google Voice Search App

    Google's new voice search app lets you naturally speak questions. The image search and image previews are built for swiping. and you get faster results in micro seconds with Google Instant.

    and, Google's Doodles also be there on the home page when any occasion comes there, then Google Doodle will be show according to occasion.


    Chrome on Windows 8

    The Chrome browser is the same,but it come with some customizations to optimize for touchscreens, including larger buttons and the ability to keep Chrome open next to your other favorite apps. This time Chrome becomes more faster and good web experience it will give to users.


    Give Your Views and Suggestions About It in Comments

    Thursday, October 25, 2012

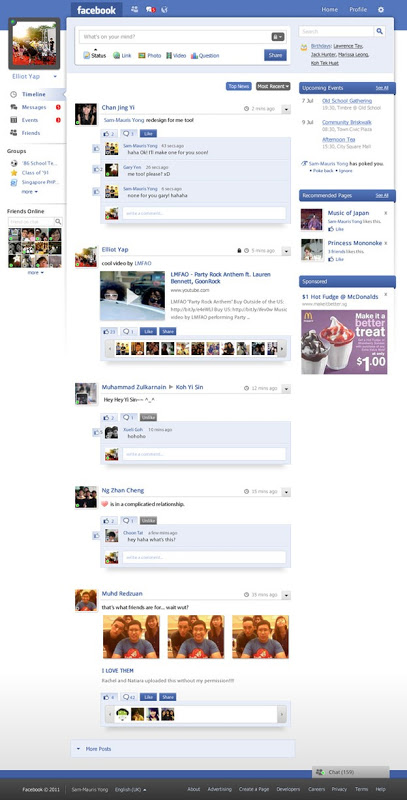
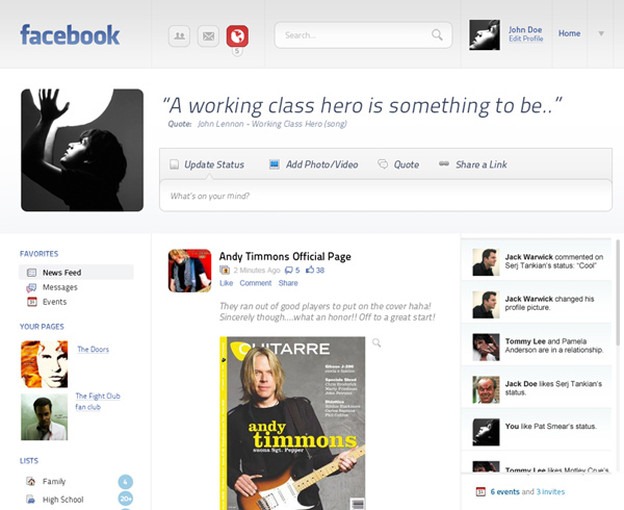
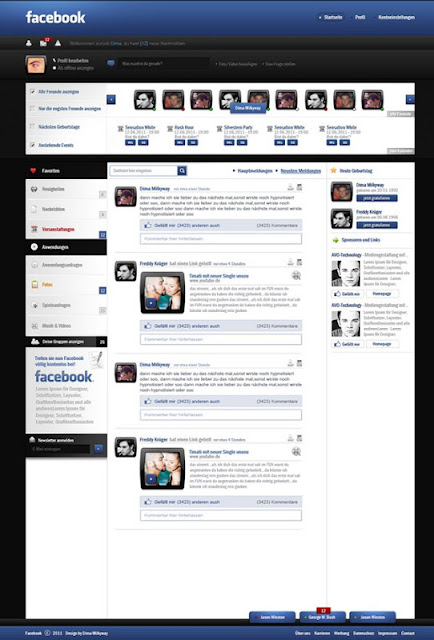
    Future Facebook Layouts


    Facebook recently upgrade their layot by sing timeline covers and change their look but as the news comes out from the anonymous is that facebook designed their layouts for the future and there are 10 designs which could be Facebook's Future Layouts. So, Check them all.


    Note:- These Layouts did not announce by Facebook Officially 


    Check Future Layout of Facebook


    Give Your Comments About it

    Wikileaks Like Project Going to Launch Called TYLER


    International hacker group Anonymous is going to create a WikiLeaks competitor scandalous leak portal called Tyler, it's for the publication of secret information from governments of various countries. One of the group’s members, who specified that he is representing the collective, spoke about the TYLER project and the rift with WikiLeaks in an email interview with the Voice of Russia.


    Launching Date

    They have scheduled this new project to December 21 this year. According to the hacker, who requested anonymity, the conflict between Anonymous and the website of Julian Assange revolves around the forced funding techniques and lack of transparency around money to WikiLeaks.

    So far Anonymous defends WikiLeaks and Assange personally and supported the mission of the site to share information, news and classified information with the public. They even helped to publish more than 2 million emails, known as the Syrian file.


    Why is this Happening?

    Since Assange has repeatedly threatened to close the WikiLeaks, hackers have decided to create their own platform for publishing secret government documents. According to Anonymous, Tyler will be a unique service project, as it will not have fixed the server - it will be based on the principle of decentralized or peer to peer network based on the equality of participants. Hackers claim that the attack or close the platform due to this will be impossible.


    Future of WikiLeaks....!

    When asked about the future of WikiLeaks, the anonymous hacker said.....
    “Julian has threatened on at least one previous occasion to pull the plug on the project because the fundraising was not meeting his expectations. It was at that time that Anonymous began planning to field our own alternative disclosure platforms. Julian desperately needs WikiLeaks, and he is the only one that can pull the plug on the project. I rather think that so long as he is in dire straits, he will not do so despite any threats from him to the contrary.”


     Wikileaks founder Julian Assange

    However, Wikileaks founder Julian Assange has defended these allegations by maintaining that fundraising is important to the running of the site and that their recent involvements have hurt their organisation financially.

    Anonymous has made their mind about the release of TYLER and they have developed it using the peer to peer technology and without any fixed server so that activists don’t face any threat at all and this project is at the top of their priorities at present. Only time will tell how successful this new endeavour turns out to be.

    Customize Background of Post Title


    My one of the friend ask that how to customize the background of post title like you. Customization is very important in blogger and anyone can easily customize  their blog and today we are discussing that how can we customize the background of post title. 

    To customize it like us it's easy and it looks cool and looks very professional and very simple and simplest form is the very important and it gives a professional look to the visitor.


    Live Demo


    Customize Background of Post Title 

    • Login to Blogger > Dashborad
    • Click on Drop Down Menu and select Template
    • Backup your Template before making any changes to your blog
    • Now Click on Edit HTML > Proceed > Expand Widget Templates
    • Press Ctrl + F and search the code shown below. 
    .post h3 {

    • Now paste below code after above code.
            background:#434343;
            color: #ffffff;
            font-size: 20px;
            font-family: Verdana;
            padding:8px 10px 8px 10px;
            text-transform:uppercase;
            line-height:1.2em;

    • Now Save your template and you are done.


    If Any Problem Comes, Ask In Comments


    Monday, October 22, 2012

    Add a Display Time of Last Visit Widget


    As we all want to track our visitors on our site but suppose if visitor want to know that last time when she/he open this site and what's the time OR day so that would be interesting for the visitor and also it will a very unique content OR widget for blog owner, so you can easily add a widget like this where your visitors can track them that when they last time visit this site.

    This widget is simply made by the JavaScript and HTML.


    widgetgenerators.blogspot.com


    Add Display Time of Last Visit Widget

    • Login to Blogger > Dashboard
    • Click on Drop Down Menu and select Layout
    • Click on Add a Gadget and Choose HTML/JavaScript Widget
    • Paste below code in it. 

    <script type = "text/javascript">

    /***********************************************
    * Display time of last visit script- by http://widgetgenerators.blogspot.com

    * This notice MUST stay intact for use
    * Visit JavaScript Kit at
    http://widgetgenerators.blogspot.com for this script and more blogging stuff is  waiting for u.
    ***********************************************/

    var days = 730; // days until cookie expires = 2 years.
    var lastvisit=new Object();
    var firstvisitmsg="This is Your First Visit on This Website. Welcome!";
    lastvisit.subsequentvisitmsg="Welcome Back Visitor! Your Last Visit Was on <b>[displaydate]</b>";

    lastvisit.getCookie=function(Name){
    var re=new RegExp(Name+"=[^;]+", "i");
    if (document.cookie.match(re))
    return document.cookie.match(re)[0].split("=")[1];
    return'';
    }

    lastvisit.setCookie=function(name, value, days){
    var expireDate = new Date();

    var expstring=expireDate.setDate
    (expireDate.getDate()+parseInt(days));

    document.cookie = name+"="+value+"; expires="+expireDate.toGMTString()+"; path=/";
    }

    lastvisit.showmessage = function() {
    var wh = new Date();
    if (lastvisit.getCookie("visitc") == "") {
    lastvisit.setCookie("visitc", wh, days);
    document.write(firstvisitmsg);
    }

    else {
    var lv = lastvisit.getCookie("visitc");
    var lvp = Date.parse(lv);
    var now = new Date();
    now.setTime(lvp);
    var day = new Array("Sun", "Mon", "Tues", "Wed", "Thur", "Fri", "Sat");
    var month = new Array ("Jan", "Feb", "Mar", "Apr", "May", "Jun", "Jul", "Aug", "Sep", "Oct", "Nov", "Dec");
    var dd = now.getDate();
    var dy = now.getDay();
    dy = day[dy];
    var mn = now.getMonth();
    mn = month[mn];
    yy = now.getFullYear();
    var hh = now.getHours();
    var ampm = "AM";
    if (hh >= 12) {ampm = "PM"}
    if (hh >12){hh = hh - 12};
    if (hh == 0) {hh = 12}
    if (hh < 10) {hh = "0" + hh};
    var mins = now.getMinutes();
    if (mins < 10) {mins = "0"+ mins}
    var secs = now.getSeconds();
    if (secs < 10) {secs = "0" + secs}
    var dispDate = dy + ", " + mn + " " + dd + ", " + yy + " " + hh + ":" + mins + ":" + secs + " " + ampm
    document.write(lastvisit.subsequentvisitmsg.replace("\[displaydate\]", dispDate))
    }

    lastvisit.setCookie("visitc", wh, days);

    }

    lastvisit.showmessage();

    </script>

    • Now Click on Save Button.


    Note:- Add Your HTML/JavaScript Widget on below position (see image)


    Make Changes (Optional)

    • You can replace this text This is Your First Visit on This Website. Welcome! with your own text (Optional)
    • You can also replace this text Welcome Back Visitor! Your Last Visit Was on with your own text (Optional)


    Give Your Feedback About This Widget

    Sunday, October 21, 2012

    How to Measure SEO Effectiveness of Blog


    Search Engine Optimization is very important topic in today's world because every website/blog's traffic on SEO and the effectiveness of SEO is also more important then the other task because everyone want to make their site no. 1 in search engines and measuring effectiveness of SEO is very important, so here are some tips to measure the effectiveness of SEO for your blog/site. 


    Measure Effectiveness of SEO

           There are following 3 factors for measuring the SEO Effectiveness of your site/blog.


    1) Monitor Keyword Rankings

    In the starting every website will be targeted to few keywords which are relevant to respective website niche. SEO Professionals should make sure that “respective landing pages of the website should be indexed & ranked for targeted keywords”

    If your website is started ranking for few long tail keywords in the first month itself, it means “your SEO team is doing the right job”. Also month over month keyword rankings positions should be improved. With the help of following kind of report everybody can measure their SEO effectiveness.

    Note: This will not happen in all cases, because few of the niches are highly competitive, so it will take little more time to get results.


    2) Analyze Monthly Visitors

    Every website/blog visits can be tracked through Google Analytics and Alexa Algorithms. It’s free tool offered by Google and Alexa respectively and also simple to install & activate on website/blog. Usually for a new website minimum two months’ time required to receive traffic from search engines. From 3rd month onwards every website/blog will start receiving little traffic and it should be gradually increased month over month. Of course, traffic increase in every month is a difficult task, so at least existing minimum traffic shouldn’t be decreased.

    If your SEO team is continuously adding new content pages then the traffic should be improved. So keep an eye on website traffic and measure your SEO team efforts.


    3) Track Leads & Conversions

    Your website/blog should have Phone number, Email ID and Inquiry box if you are offering services. If your site is an eCommerce portal then it’s important to have online payment facility, so that visitors will purchase your products through online.

    Compare month over month stats whether you are receiving any inquiries or sales from your website or not and calculate ROI. Sometimes cannot expect immediate ROI through SEO efforts as SEO will give good results in longer run. However make sure to push and keep little pressure on your SEO team to have max output.


    Your SEO Will Be Improve Definitely 

    Thursday, October 18, 2012

    Important Tips To Do Before Applying For Adsense


    In the today's online time online earning has 100's option but Google Adsense is still one of the best and trusting option and platform for online earning for newbies and bloggers.

    As newbies want a Adsense account as soon as possible, so these are some kind of simple steps to use Adsense account.


    What is Adsense....?


                    Google AdSense is a program run by Google Inc. that allows publishers in the Google Network of content sites to serve automatic text, image, video, and rich media adverts that are targeted to site content and audience. These adverts are administered, sorted, and maintained by Google, and they can generate revenue on either a per-click or per-impression basis. Google beta-tested a cost-per-action service, but discontinued it in October 2008 in favor of a DoubleClick offering (also owned by Google).  In Q1 2011, Google earned US$2.43 billion ($9.71 billion annualized), or 28% of total revenue, through Google AdSense.


    Google Adsense is affiliating service where Google give us their ads and we have to publish that ads in our blog / websites, and we can earn uncountable money from adsense, that is depend on our content.

    Some Points to keep in Mind

    • Google Account
    • Add Meta Tags 
    • Length of Post
    • Custom Domain
    • Age of Domain 
    • Supportive Language 
    • Google Official Widget
    • Webmaster Enabled Site
    • Pages
    • Unique Content
    • Traffic


    Google Account

               To sign up for Adsense account  you should have a Google/Gmail Account. If you don't have gmail account, you can sign up from here


    Add Meta Tags

              Add Meta Tags in your blog/website, they will help your blog to increase your SEO traffic and Meta Tags will help to find the site info to search engines.
    Add this Meta Tag Code below <head> section of your blog.

    <meta content='YOUR BLOG TITLE' name='title'/>
    <b:if cond='data:blog.metaDescription != &quot;&quot;'>
      <meta expr:content='data:blog.metaDescription' name='description'/>
    </b:if>
    <b:if cond='data:blog.url == data:blog.homepageUrl'> <meta content='YOUR BLOG DESCRIPTION' name='description'/></b:if>
    <meta content='KEYWORDS HERE' name='keywords'/>
    <meta content='AUTHOR NAME' name='author'/>
    <meta content='INDEX,FOLLOW' name='robots'/>
    <meta content='index, follow' name='googlebot'/>
    <meta content='text/html; charset=UTF-8' http-equiv='content-type'/>

    • Replace this with your Blog Title : YOUR BLOG TITLE
    • Replace this with your blog description :  YOUR BLOG DESCRIPTION
    • Replace this with keywords [ each one separated by a comma and not too much ] : KEYWORDS HERE
    • Replace this with the author name : AUTHOR NAME

      Length of Posts

      • Every posts must exceed a length of approximately 600 words or more . If your posts are not exceeding this limit, Google will say that your posts are of short lengths.
      • And also, check for major grammar mistakes.

      Custom Domain

      • Your Blog should have a custom domain like www.yoursite.com NOT www.yoursite.blogspot.com
      • Earlier Google Approves that sub-domain account but as the Google get daily thousands of request daily, so Google changed their policy for Adsense on Custom domain.

       Age of Domain

      • Your domain should be minimum 6 months older, then only Google Approve your Adsense request.
      • If your content id unique and rich and you have good no. of visitors then you will get Adsense Account before 6 months.

       Adsense Supportive Language

      • Language of your site/blog should be supportive to adsense like English(US) 

       Google Official Widget

      • For better and SEO friendly blog and good adsense CTR, you should use Google's +1 Badge Widget.
      • Page +1 Widget 
      • Popular Post Widget
      • About Author Widget

      Webmaster Enable Site

      • For a Good SEO and fast adsense account you should submit your blog to Google's Webmaster.
      •  You have to read this article from Google and make your website agrees with these quality guidelines :


      http://support.google.com/webmasters/bin/answer.py?hl=en&answer=35769

      • Some include adding alt tags and robots.txt files.

       Pages

          Your Blog Should have some pages which tells the policy of your site/blog like our website.
      • Private Policy
      • Contact Us
      • Disclaimer
      1. Create your Privacy Policy page from Privacy Policy Generator from here
      2. Create your Contact Us page from here
      3. Create your Disclaimer page like us (You can Copy Our Page)


      Unique Content

      • Your content on your blog should not be copied.
      • and, that should be self return.

       Traffic

      •  When you are going to submit your site to adsense, your site traffic might exceed a limit of 300.
      • When my adsense account got approved, it was above 5000

      Saif say 'Thank you beta' to Kareena on his wedding in 1991


      Saif Ali Khan married Kareena Kapoor, their marriage became butt of jokes on social media. Kareena is 10 years his junior.

      One message that went viral was that Kareena Kapoor attended Saif Ali Khan's marriage to Amrita Singh in 1991. Kareena was 11 years old at that time. After his wedding she went up to him and congratulated. To which Saif had replied, "Thank you, beta"!!

      About His First Marriage

                         Saif, 42, son of late Mansoor Ali Khan Pataudi and Sharmila Tagore, was earlier married to Amrita Singh, who was about 12 years his senior.

      After that Saif divorced his first wife and started dating Kareena in 2007.


      Rare Pics of Saif and Amrita


      Saif's Son and Daughter


      Give Your Views About This Post


      This post was Written Vicky Saxena, A Newbie in Blogging lWorld and He Love to read about Bollywood and Celebrity.

      Wednesday, October 17, 2012

      Google Launched the Disavow Links Tool for Webmasters


      After such a long time finally Google Launched their killing Disavow Link for webmasters. Google’s Distinguished Engineer Matt Cutts announced the new Google Webmaster Tools feature today during his PubCon keynote, urging all SEOs and webmasters to proceed with extreme caution. Bing search engine already has launched their Disavow Link Tool in July and heart that Google will also launch their tool soon and finally that comes here.


      What is Disavow Link Tool


                       Disavow Link Tool is basically a kind of Webmasters Tool which is helpful to remove the strongest spams in the website (like which is impossible to remove) and that spams is harmful for your blog/website. Disavow Link Tool is able to remove that spams from your blog/website.


      Google’s Distinguished Engineer Matt Cutts Said...


                  "The goal with the launch is to keep the tool simple. To disavow links, all you have to do is upload a text file, with one URL per line (full domain or specific page), of links you want Google to ignore. These are the links pointing at your site that you’re telling Google that you don’t trust"


      Basically He said

               If you have a bad page which does not have too much importance on your site, and you are better to off removing it and returning a 404 when the URL of that page has been accessed.But you cannot exactly do that if the page with bad links is your homepage, in this caste this tool will help to redirect on 404 error page OR to remove it.


      How to Use it....?

       
      • Google will prompt you to upload a plain text file with the links you want to disavow.

      Example File is Here....

      # Contacted owner of yoursite.com on 18/10/2012 to
      # ask for link removal but got no response domain:yoursite.com
      # Owner of yoursite2.com removed most links, but missed these

      http://www.yoursite2.com/indexA.html
      http://www.yoursite2.com/indexB.html
      http://www.yoursite2.com/indexC.html


      Note:- This is an advanced feature and should only be used with caution. If used incorrectly, this feature can potentially harm your site's performance in Google's search results. We recommend that you use only Disavow Link Tool if you believe that you have a considerable number of spammy, artificial, or low-quality links pointing to your site, and if you are confident that the links are causing issues for you.


      Cutts in the Video Tutorial, telling about it....!


      Enjoy the New Webmaster Tool of Google