Thursday, November 29, 2012

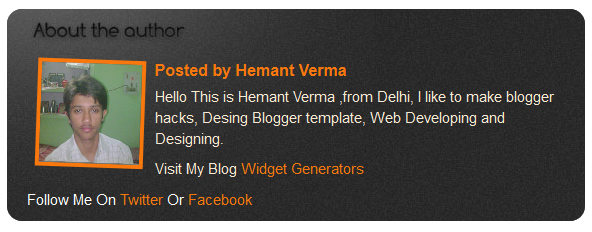
Add a Pro About Author Widget Below Every Post


When we post anything in our blogger post then some times we have to give the info about the author but some author always show a about author info below each post, and we also give the same widget but some blogger write codes at end of the each post, when we post anything but in this widget you have to install codes only one time, and you are done.


Add Pro About Author Widget

  • Login to Blogger > Dashborad
  • Click on Drop Down Menu and select Template
  • Backup your Template before making any changes to your blog
  • Now Click on Edit HTML > Proceed > Expand Widget Templates
  • Press Ctrl + F and search the code shown below.

]]></b:skin>

  • Paste below code before ]]></b:skin>

/*------Codes By www.widgetgenerators.blogspot.com------*/
#wg-authorbox {
background:#333 url(http://2.bp.blogspot.com/-L5Tvv0yJrr4/TvsFt-Mh82I/AAAAAAAACC0/9eva5jXci8U/s1600/about_author.jpg) no-repeat scroll left top;
width:auto;
overflow:hidden;
color:#fff;
-moz-border-radius:15px;
-webkit-border-radius:15px;
border-radius:15px;
margin:5px auto;
padding:40px 10px 10px 20px;
}
#wg-authorbox:hover {
-webkit-box-shadow: 0px 0px 10px  rgba(0, 0, 0, .3);
-moz-box-shadow: 0px 0px 10px  rgba(0, 0, 0, .3);
box-shadow: 0px 0px 20px  rgba(0, 0, 0, .3);
}
#wg-authorbox h4 {
font-size:16px;
color:#fff;
clear:none;
margin:0;
padding:10px 10px 5px;
}
#wg-authorbox .author_small {
font-style:italic;
}
#wg-authorbox img {
-webkit-transition:  -webkit-transform .15s linear;
-webkit-box-shadow: 0 3px 6px rgba(0,0,0,.25);
-moz-box-shadow: 0 3px 6px rgba(0,0,0,.25);
padding: 5px 5px 5px 5px;
-webkit-transform:  rotate(+2deg);
-moz-transform: rotate(+2deg);
float:left;
border:4px solid #F9780E;
margin:10px;
padding:0;
}
#wg-authorbox img:hover {
-webkit-box-shadow:  0 3px 6px rgba(0,0,0,.5);
-moz-box-shadow: 0 3px 6px rgba(0,0,0,.5);
-webkit-transform:  rotate(-1deg);
-moz-transform: rotate(-1deg);
}
#wg-authorbox p {
color:#F9EAD4;
margin:0;
padding:0 10px 10px;
}
#wg-authorbox a {
color:#F9780E;
}

  • Now search for <data:post.body/>
  • Paste below code after it.

<br/>
<br/>
<div id="wg-authorbox">      
<img alt="About Author" src="https://blogger.googleusercontent.com/img/b/R29vZ2xl/AVvXsEitJVZy1gLQh3SMJdo965MNn2eIO2LEiAhoLUU9Kp8DuOae544sQf6oe7fLh6PBH7wdkYl141J7HEprpbOjI4anuU15z93zcJrDc5ROZqB-4OpjFnbKZBBIuCBnOLoVDgkwcY2-98P7SsS1/s1600/Butnty.jpg" height="100" width="100"/>
<h4><a href="https://plus.google.com/108584822806858722112" title="Posts by Hemant Verma" rel="author">Posted by Hemant Verma</a></h4>
 <p>Hello This is Hemant Verma ,from Delhi, I like to make blogger hacks, Desing Blogger template, Web Developing and Designing. </p> <p>Visit My Blog <a href="http://www.widgetgenerators.blogspot.com">Widget Generators</a></p> | Follow Me On <a href="http://www.twitter.com/WidgetGenerator">Twitter</a> Or <a href="http://www.facebook.com/WidgetGenerators">Facebook</a></div>

  • Save your template after changes.


Make Changes....!

  • Replace this link with your own image link https://blogger.googleusercontent.com/img/b/R29vZ2xl/AVvXsEitJVZy1gLQh3SMJdo965MNn2eIO2LEiAhoLUU9Kp8DuOae544sQf6oe7fLh6PBH7wdkYl141J7HEprpbOjI4anuU15z93zcJrDc5ROZqB-4OpjFnbKZBBIuCBnOLoVDgkwcY2-98P7SsS1/s1600/Butnty.jpg
  • Replace this Google + ID with your own Google + ID 108584822806858722112
  • Replace this name with your own name Hemant Verma
  • Replace this author bio with your own bio Hello This is Hemant Verma ,from Delhi, I like to make blogger hacks, Desing Blogger template, Web Developing and Designing
  • Replace this blog link with your blog/site link http://www.widgetgenerators.blogspot.com
  • Replace this blog name with your blog name Widget Generators
  • Replace this twitter user name with your own user name WidgetGenerator
  • Replace this facebook user name with your own user name WidgetGenerators
 

If Any Problem Comes, Ask in Comments

Groom Floating Pro Social Bookmarking Widget for Blogger


As from the previous post related with bookmarking widget which liked by many visitors. So, today there is also a new and professional looking widget for blogger with shadow effect and mouse hover effect in the widget with blue groom widget. I give a name for it groom be'coz this is wedding season in India and today's my childhood friend will be a groom :-) and this wedding dress's color is same like this widget's blue background :-)

This widget is simply made by using the HTML CSS and some JavaScripts. We use JavaScript in this widget be'coz we have to make it float with scrolling down and scrolling up.


Add Groom Floating Widget

  • Login to Blogger > Dashboard
  • Click on Drop Down Menu and select Layout
  • Add a HTML/JavaScript Gadget
  • Paste below code in it. 


<link href="https://dl.dropbox.com/u/63968842/floting%20widget.css" rel="stylesheet" type="text/css" />

<script type="text/javascript">
<!--
function MM_swapImgRestore() { //v3.0
  var i,x,a=document.MM_sr; for(i=0;a&&i<a.length&&(x=a[i])&&x.oSrc;i++) x.src=x.oSrc;
}
function MM_preloadImages() { //v3.0
  var d=document; if(d.images){ if(!d.MM_p) d.MM_p=new Array();
    var i,j=d.MM_p.length,a=MM_preloadImages.arguments; for(i=0; i<a.length; i++)
    if (a[i].indexOf("#")!=0){ d.MM_p[j]=new Image; d.MM_p[j++].src=a[i];}}
}

function MM_findObj(n, d) { //v4.01
  var p,i,x;  if(!d) d=document; if((p=n.indexOf("?"))>0&&parent.frames.length) {
    d=parent.frames[n.substring(p+1)].document; n=n.substring(0,p);}
  if(!(x=d[n])&&d.all) x=d.all[n]; for (i=0;!x&&i<d.forms.length;i++) x=d.forms[i][n];
  for(i=0;!x&&d.layers&&i<d.layers.length;i++) x=MM_findObj(n,d.layers[i].document);
  if(!x && d.getElementById) x=d.getElementById(n); return x;
}

function MM_swapImage() { //v3.0
  var i,j=0,x,a=MM_swapImage.arguments; document.MM_sr=new Array; for(i=0;i<(a.length-2);i+=3)
   if ((x=MM_findObj(a[i]))!=null){document.MM_sr[j++]=x; if(!x.oSrc) x.oSrc=x.src; x.src=a[i+2];}
}
//-->
</script>


<div id="floatdiv">
<div id="sidebar">


<div id="rss"><a href="http://feeds.feedburner.com/WidgetGenerators" onMouseOut="MM_swapImgRestore()" onMouseOver="MM_swapImage('rss','','https://blogger.googleusercontent.com/img/b/R29vZ2xl/AVvXsEjSbt38kEQboScgxJpYyAV8fiCS1Th55rOvYuNAQyBmB-lvjf6CzUpRKgwNopBDoucVAfSrfECFiTX3D4JyKjvAhJRJc9cRWk-XEc7X-stQZNewKw0A0IPUpygzzWTWfqacXprADeYsW8gI/s1600/rss-front.png',1)"><img src="https://blogger.googleusercontent.com/img/b/R29vZ2xl/AVvXsEh9rvVyceCruAz9yEFxPUzRbR10OtkomyaLR6KWMOHv6dFR7yzf5VdYijo9lfWMQlEr_eA3zV44bHzUoMFgBhNdRR37fVDIysrr1xCKrLQl4MH7NmksDhpWZhW2Py7Ci7Me2nZgNI6JYwgY/s1600/rss-back.png" alt="My RSS Feed" name="rss" width="48" height="48" border="0" id="rss2" /></a></div>

<div id="youtube"><a href="http://www.youtube.com/WidgetGenerators" onMouseOut="MM_swapImgRestore()" onMouseOver="MM_swapImage('you tube','','https://blogger.googleusercontent.com/img/b/R29vZ2xl/AVvXsEiwpgXDsSnwKY0UaArnlPQ_H2WVjhkw3gFs_VwmHOD9SaW7HqBAjaTiEKGlmE0DZU3tw5NXtp1cUXL2nBEF1puQTfHsL-BJMFj-8kPVZTA1bgI9b88W59yErlD8GXQLsbpa3aJpt1CjYTy_/s1600/youtube-front.png',1)"><img src="https://blogger.googleusercontent.com/img/b/R29vZ2xl/AVvXsEi78QUMJ1bZB8iVPrNueOce2uTQYQLL34h8HL72e3lxjFLAZ2M7K5l0M3twSGKgX-5f47tPUiO4krs8bkOpUweMD0rF-KWZJOo7oh7wVsoJ8U3Qo_0qFRSzFv0LwFy4wGni77JX3UtVV4tx/s1600/youtube-back.png" alt="My YouTube Channel" name="you tube" width="52" height="44" border="0" id="you tube" /></a></div>

<div id="twitter"><a href="http://www.twitter.com/WidgetGenerator" onMouseOut="MM_swapImgRestore()" onMouseOver="MM_swapImage('twitter','','https://blogger.googleusercontent.com/img/b/R29vZ2xl/AVvXsEiiSpzcBWlwPlZkR9ki30AR2htdEI7MelXM6Tez-oTSxq0szV_m0S7rNQ4ry5FTX6LJZz8cFEIm9L76jN66bHfJOODjZ9rn5ICq_g7HQQmD-9wQLiudlj9d0OJhFfPGUdfhNslikI5kl0By/s1600/twitter-front.png',1)"><img src="https://blogger.googleusercontent.com/img/b/R29vZ2xl/AVvXsEjCKYTKrEPG2mw3_ny-zDrMJOMHLaG9NBar9ji-j9Euz4JWDdUI4N7lVEZxgvncgeLDDd9r0Myq7NVyVOrmvy-oX-tQay_fp2tpIQxjNuXejTrTleDEPLrcpkhLa-kaeqEboc9jxcAAW0x_/s1600/twitter-back.png" alt="My Twitter Feed" name="twitter" width="53" height="53" border="0" id="twitter2" /></a></div>

<div id="contact"><a href="http://www.facebook.com/WidgetGenerators" onMouseOut="MM_swapImgRestore()" onMouseOver="MM_swapImage('contact','','https://blogger.googleusercontent.com/img/b/R29vZ2xl/AVvXsEgJEFksZsYIG2iZLSTELS9wkoI31nP7nj2tSvjBEGbJJ5mwYeXYXaNlkDrYoclDyLccDJ-UfP0FsRYWvqhE94KlXBZx7m8OgzHk5WQiKAKHFdh7gmwcLpkem99HqhDcuSzAKTmbKV4nZmzo/s1600/facebook-icon.png',1)"><img src="https://blogger.googleusercontent.com/img/b/R29vZ2xl/AVvXsEgOGb8DuFxFtzRkAuUCFdEO0S5jc2J94bwEebJThGTZdyF3b3a9ISM7WvISc8AZ7aXRrEHLTtn4TyHHCX8TxWgsv0e9pSdwmL1Xc5s2tJnoWfn5qMIi_kdE2sOMBYTwgTtXeVMEBqQ4oF_u/s1600/facebook_icon.png" alt="Facebook" name="contact" width="42" height="41" border="0" id="contact2" /></a></div>


</div>
</div>
<script type="text/javascript" src="https://dl.dropbox.com/u/63968842/floting%20widget.js"></script>

  • Now Save Your Widget  and You are done.


Make Changes....!

  • Replace this text with your RSS username WidgetGenerators
  • Replace this text with your Youtube usename WidgetGenerators
  • Replace this text with your Twitter username WidgetGenerator
  • Replace this text with your Facebook username WidgetGenerators


If any Problem Comes, Ask in Comments

Tuesday, November 27, 2012

How to Hide Sidebar, Header in Individual Post and Static Page


As many times we want to create a full width page post related with different topic like as we create for generators and for this simple implementation we have to hide our sidebar, post footer, middle bar etc. in specific post or in static pages.


 Hide Sidebar in Pages and Posts

  • Login to Blogger > Dashboard
  • Click on Drop Down Menu and select Post
  • Click on HTML
  • Paste below code in it, before create a post.
    <style>

    #sidebar-wrapper, #midsidebar-wrapper, .gapad2, .blog-pager, .post-header-line-1, .post-footer { display:none !important;}

    #main-wrapper { width:98%!important;}

    .post { width:98%!important; }

    </style>

  • Now you can start to write your post.
  • This code will hide your sidebar, middle sidebar, post footer and other unnecessary widget in specific. 


Hide Only Header in  Pages and Posts

  • Login to Blogger > Dashboard
  • Click on Drop Down Menu and select Post
  • Click on HTML
  • Paste below code in it, before create a post.

    <style>

    #header { display:none !important;}

    #main-wrapper { width:742px!important;}

    .post { width:715px!important; }

    </style>

  •  Now you can start to write your post.
  • This code will hide only header in specific post and in pages.


Customization

  • Adjust the width to replace this 98% according to your blog width and requirements.
  • Adjust the width to replace this 742px and 715px according to your blog width and requirements.


If Any Problem Comes, Ask in Comments


Blackino Pro Social Bookmarking Widget


Most Bookmarking Widget is making day by day but this one is very different be'coz it's a totally professional and very smart with blacky background widget which is full fill with the professionalism and it's perfect for the white and black template and also good for the grey template like our template. and it's blackino called be'coz black is very smart color. 

This widget is fully customize with CSS and HTML so it's easy to install and also it works very smoothly.We also use some little bit code of JavaScript in the end of codes, that is only for smoothness of colors and for giving the sharpness on them, and also reduce the weight of CSS and HTML codes and it will give a professional look to your blog and it's also perfect to attract the visitors and easily you can increase your members.


Add Blackino Pro Social Bookmarking Widget 

  • Login to Blogger > Dashboard
  • Click on Drop Down Menu and select Layout
  • Add a HTML/JavaScript Gadget
  • Paste below code in it.

<style>
.wgbanner {
margin-left:15px;
margin-top:10px;
}

.wg-vl {
margin-top:7px;
}

#wg-social-hover {
position:relative;
width:240px;
height:400px;
background:#554e4c url(https://blogger.googleusercontent.com/img/b/R29vZ2xl/AVvXsEgFUN1klk41OFVJdObkqeGg2SDbwH83N-KDcXnc4M8fPKcz454pfnVxs3ZqEfl50v-wlXP12VSlVP7YIr3vLsrEovyztlq_kFGEH7_M6Z0U5cKq-bKJtIsIGx6CnFUwEg4OGlpG1_YmcB4/s1600/vintage.png);
}

#wg-social-hover #title {
font-family:'Open sans';
font-size:28px;
color:#fff;
font-weight:600;
text-align:center;
line-height:1.1em;
text-shadow:1px 1px 1px rgba(0,0,0,0.3);
margin:30px 20px 0;
}

#wg-social-hover #title span {
display:block;
font-size:14px;
line-height:1.5em;
margin-top:10px;
font-weight:400;
}

#wg-social-hover #links {
position:absolute;
bottom:0;
width:100%;
}

#wg-social-hover a {
display:block;
height:42px;
line-height:42px;
color:#fff;
font-size:12px;
background:rgba(0,0,0,0.08);
border-top:1px solid rgba(0,0,0,0.1);
-webkit-transition:all .25s ease-in-out;
-moz-transition:all .25s ease-in-out;
-o-transition:all .25s ease-in-out;
padding:0 20px;
}

#wg-social-hover a:hover {
background:rgba(0,0,0,0.15);
text-decoration:none;
}

#wg-social-hover a.twitter:hover {
background:#79dbff;
}

#wg-social-hover a.facebook:hover {
background:#6e9bee;
}

#wg-social-hover a.google:hover {
background:#00be00;
}

#wg-social-hover a.pinterest:hover {
background:#cb2027;
}

#wg-social-hover a.rss:hover {
background:#ffae42;
}

#wg-social-hover a span {
height:15px;
line-height:15px;
width:15px;
text-align:center;
margin-right:20px;
font-size:13px;
border-radius:99px;
background:rgba(0,0,0,0.1);
padding:5px;
}

#home-tagline {
text-align:center;
font-size:32px;
color:#000;
font-weight:300;
margin:60px 0 40px;
}

#home-tagline strong {
color:#ff5421;
font-weight:300;
}

#home-highlights {
margin-bottom:40px;
}

.home-highlight {
float:left;
width:142px;
margin-right:21px;
text-align:center;
display:block;
opacity:0.9;
color:#796f6c;
font-size:40px;
background:rgba(0,0,0,0.04);
-webkit-border-radius:4px;
-moz-border-radius:4px;
border-radius:4px;
-webkit-transition:all .25s ease-in-out;
-moz-transition:all .25s ease-in-out;
-o-transition:all .25s ease-in-out;
padding:30px 0;
}

.home-highlight:hover {
color:#3a3534;
text-decoration:none;
background:rgba(0,0,0,0.1);
}

.home-highlight-title {
font-size:13px;
text-align:center;
color:#796f6c;
cursor:pointer;
font-weight:900;
-webkit-transition:all .25s ease-in-out;
-moz-transition:all .25s ease-in-out;
-o-transition:all .25s ease-in-out;
margin:7px 0 0;
}

.home-highlight:hover .home-highlight-title {
color:#3a3534;
}

#home-featured {
min-height:400px;
margin-bottom:37px;
}

#home-featured .home-divider {
margin-top:0;
}

#home-featured h2 {
text-align:center;
font-size:32px;
color:#161414;
font-weight:300;
margin:0 0 40px;
}

#home-featured h2:after {
display:block;
content:"";
width:342px;
height:1px;
background:#161414;
margin:5px auto 0;
}

.featured-theme-entry-content {
font-size:16px;
float:left;
width:430px;
font-weight:300;
}

.featured-theme-entry-content h3 {
font-size:21px;
line-height:1.4em;
font-weight:400;
margin:0;
}

.featured-theme-entry-content .button {
margin-top:15px;
}

.featured-theme-entry-content .button:hover {
background:#f5634a;
opacity:1;
}

.featured-theme-entry-img {
display:block;
float:right;
margin-right:5px;
}

.featured-theme-entry-img a {
display:block;
background:#fff;
border-radius:2px;
padding:6px;
}

#featured-theme-slider .flex-control-nav {
position:absolute;
top:-20px;
left:-54px;
}

#featured-theme-slider .flex-direction-nav li a {
background:#312d2c;
cursor:pointer;
display:block;
height:70px;
line-height:70px;
width:30px;
color:#fff;
text-align:center;
position:absolute;
top:50%;
-moz-transition:background .3s ease-in-out 0;
opacity:0.15;
border-radius:4px;
margin:-30px 0 0;
}

#featured-theme-slider .flex-direction-nav li .flex-prev {
left:-90px;
}

.home-highlight p,#featured-theme-slider .flex-direction-nav {
margin:0;
}
</style>

<div id="wg-social-hover">
<div class="wgbanner"><img src="https://blogger.googleusercontent.com/img/b/R29vZ2xl/AVvXsEiTHaZybKabqND1dkwwQ4qtuwO6hWzFMxNuIzbzpuycImQieNlev_LhL-z_Fa2LDURVGGRkfww2QNW8MfZxeHZXNrjaykSefiK7WR6PJO51ljJLWCbCrd7xLqBVAymsIlBdnJBW3J_xlUY/s1600/SUB-BAN.png" /></div>

    <div id="links"><a href="http://twitter.com/WidgetGenerator" class="twitter" title="Twitter" target="_blank"><div class="wg-vl"><img src="https://blogger.googleusercontent.com/img/b/R29vZ2xl/AVvXsEgp3ngZQJgirMwRKY40vmO635Tx0rmkaAHWT5XC5TsU5Pbea4uTt0kZkeOuAjWQhyphenhyphenOzMbpu4-qxXV6PnkJRcv2mpgqow4sYVYgg-i5NrtU8leCLyrNN1C5T5Su62f_7rrkzJYiI3BlpxZE/s1600/twitter.png" /></div></a>

    <a href="http://www.facebook.com/WidgetGenerators" class="facebook" title="Facebook" target="_blank"><div class="wg-vl"><img src="https://blogger.googleusercontent.com/img/b/R29vZ2xl/AVvXsEj996DZoZ6X3LAliky0Sftu3ErB6knC89gBTuOk5QcrILvkrMGjRZxy4qCDlc649pMRULLfWDe99GS3wUcG6MZAEHCj87YEOLv4JI4Gl20y_xeUPu2XovAQWHNVgieE8ueP-e0CTQGEMBM/s1600/FB.png"  /></div></a>

    <a href="https://plus.google.com/u/0/107877224551351252870" class="google" title="Google Plus" target="_blank"><div class="wg-vl"><img src="https://blogger.googleusercontent.com/img/b/R29vZ2xl/AVvXsEhpNpiTbYsXJkHNNHhYU23YqKf-PyMDpKoNfiqp86THk2yNKA0YAfwZTbYer9g9XpJdMX4hDcqGia7A-uJFXsHlE4M8jv2ZNe1exFUpGGkN3wckmMch5gFzd-xvqCAYrcP162IMUPf5Rfo/s1600/google.png" /></div></a>

    <a href="http://pinterest.com/WidgetGenerators" class="pinterest" title="Pinterest" target="_blank"><div class="wg-vl"><img src="https://blogger.googleusercontent.com/img/b/R29vZ2xl/AVvXsEh1A1k-qh-1TWJTNjEQf504qQvr4311bnzAF9hwc7krPViYA3WVco6SGX7PPFvzO36wn8okJ1uHu0M4MSiLA_gB_vEfkbrI8DXBbJ_GfbwaWiawiHIyoAufotm8WVrhGHHkGcHzFHIl7jc/s1600/pin.png" /></div></a>

    <a href="http://feeds.feedburner.com/WidgetGenerators" class="rss" title="Feedburner" target="_blank"><div class="wg-vl">
<script language="javascript">
document.write( unescape( '%3C%69%6D%67%20%73%72%63%3D%22%68%74%74%70%3A%2F%2F%34%2E%62%70%2E%62%6C%6F%67%73%70%6F%74%2E%63%6F%6D%2F%2D%79%4F%45%5A%51%54%37%69%74%37%34%2F%55%4B%39%77%43%6C%43%50%77%70%49%2F%41%41%41%41%41%41%41%41%49%50%51%2F%45%4B%34%43%42%39%32%78%51%39%38%2F%73%31%36%30%30%2F%72%73%73%2E%70%6E%67%22%20%2F%3E%3C%2F%64%69%76%3E%3C%2F%61%3E%0A%3C%2F%64%69%76%3E%3C%2F%64%69%76%3E%20%20%20%20%0A%3C%73%70%61%6E%20%73%74%79%6C%65%3D%22%20%6C%69%6E%65%2D%68%65%69%67%68%74%3A%30%70%78%3B%20%66%6F%6E%74%2D%73%69%7A%65%3A%38%70%78%3B%20%66%6F%6E%74%2D%77%65%69%67%68%74%3A%62%6F%6C%64%3B%20%61%6C%69%67%6E%3A%72%69%67%68%74%3B%0A%20%20%20%20%20%20%22%3E%0A%20%20%20%20%3C%61%20%73%74%79%6C%65%3D%22%63%6F%6C%6F%72%3A%23%44%33%44%33%44%33%3B%22%20%68%72%65%66%3D%22%68%74%74%70%3A%2F%2F%77%77%77%2E%77%69%64%67%65%74%67%65%6E%65%72%61%74%6F%72%73%2E%62%6C%6F%67%73%70%6F%74%2E%63%6F%6D%22%3E%57%69%64%67%65%74%20%3C%2F%61%3E%3C%2F%73%70%61%6E%3E' ) );
</script>

  • Now Save Your Widget and Say Bingo.


Make Changes....!

  • Replace it WidgetGenerators with your social usernames (FOUR TIMES)
  • Replace it 107877224551351252870 with your Google + id


If Any Problem Comes, Ask in Comments

Sunday, November 25, 2012

Add Scrolling Adsense Feature When Scroll Down at Page


As last we said about some Adsense Placing Space like RIGHT, LEFT, CENTER in the blogger but this tutorial is very different be'coz you can make scroll your ads when you scroll down the page and it will show at the bottom of the page. This widget is made by using the JavaScript codes and some little CSS codes which will give a certain good look to your adsense and feel it like a pro. but as we feel that codes are highly sensitive so you can only customize the CSS part and Scrolling effect but from myside I made smoothing scrolling as much as I can. Rest is depend on you.


Read Also- Adsense Unit Placing Pack

4. Add Scrolling Adsense Feature When Scroll Down at Page


Add Scrolling Ad Units

  • Login to Blogger > Dashborad
  • Click on Drop Down Menu and select Layout
  • Add a HTML/JavaScript Gadget
  • Paste below code in it. 

<div id='BeH-Fixed'>
Place Your Adsense Codes Here
    </div>


<script>
window.onload = function() {

  function getScrollTop() {
    if (typeof window.pageYOffset !== 'undefined' ) {
      // Most browsers
      return window.pageYOffset;
    }

    var d = document.documentElement;
    if (d.clientHeight) {
      // IE in standards mode
      return d.scrollTop;
    }

    // IE in quirks mode
    return document.body.scrollTop;
  }

  window.onscroll = function() {
    var box = document.getElementById('BeH-Fixed'),
        scroll = getScrollTop();

    if (scroll <= 2509) {
      box.style.top = "2510px";
    }
    else {
      box.style.top = (scroll + 1) + "px";
    }
  };

}
 </script>
<style>
#BeH-Fixed {

  position: absolute;
  z-index:9999;
}
</style>

  • Save Your Widget and You are done.


Make Changes....!

  • Replace Place Your Adsense Codes Here it with your Adsense OR Chitika Codes.


If Any Problem Comes, Ask in Comments

Saturday, November 24, 2012

Add 3D Sliding In-Out Pro Social Sharing Widget V2 with Fixed Postion

As in our last post we provide a Sliding In-Out Pro Social Sharing Widget for blogger and today we want to share some thing same widget just with a little bit of change in this widget that it's a fixed widget and it doesn't include the email subscription box and it's a totally fixed widget with 3D and mouse hover effect as you can see in the Live Demo. It's also a totally pure CSS enabled widget with no javascript and no jQuery also it doesn't have the other plugins with make it hard to install and hard to see it you also don't need to install it many times but you can easily install it in one time just a simple step with copy and paste. As we provide the last widget with generator but for this widget we didn't have the time to make generator for it be'coz we want to share it with our visitors as soon as possible and i can't wait to share it with my visitors. So, make it correct and enjoy with this professional looking widget and after it your blog will look a professional blog.


Also Read-  Sliding In-Out Pro Social Sharing Widget Pack

2. Add 3D Sliding In-Out Pro Social Sharing Widget V2 with Fixed Position


Add 3D Sliding In-Out Pro Social Sharing Widget V2

  • Login to Blogger > Dashborad
  • Click on Drop Down Menu and select Layout
  • Add a HTML/JavaScript Gadget
  • Paste below code in it.

<!-- 3D Social Buttons by www.widgetgenerators.blogspot.com -->
<style> .WG-flt-wdt { position:fixed; right:10px; top:36% ; } .WG-flt-wdt img { float:right; clear:right; margin:1px; -webkit-transition: all .0s ease-in-out; -moz-transition: all .2s ease-in-out; -o-transition: all .2s ease-in-out; transition: all .2s ease-in-out; } .WG-flt-wdt img:hover { -moz-transform: scale(1.2) rotate(6deg); -webkit-transform: scale(1.2) rotate(6deg);  -o-transform: scale(1.2) rotate(6deg); -ms-transform: scale(1.2) rotate(6deg); transform: scale(1.2) rotate(6deg);  } </style> <div class="WG-flt-wdt">
<style> .WG1 {  display: block;  width: 64px;  height: 64px;  background: url('https://blogger.googleusercontent.com/img/b/R29vZ2xl/AVvXsEhpS2rlPZCGtTpWwCcXIbVN0VO6-tiDVFPvUGKAmZGM85IiH4Az39Z5G4ELIYD9pg7MQVHrU6bAmSfXSox8oUSFllDQ7A7UjxNzsi3S9UDOx8KAPYikEpauOAz0LZZ1OB98NP5aG7PYk0kE/s1600/Facebook+Icon.png') bottom;  text-indent: -99999px; } .WG1:hover {         background: url('https://blogger.googleusercontent.com/img/b/R29vZ2xl/AVvXsEg32rCwKxkHPP5ckGl0foWUOWZQ02-gMShxOWKIsWndVaxc-CiJz6Fj59INFPAPH5tpUIEVEJiWWeoOQHXBfmPKLQoLv14olqt-C8laaDM-TmsEFajCnMgS-B99ikElxuAOWuFaPhZsQmKF/s1600/Facebook+Rollout+Image.png' ) bottom; height: 64px; } </style> <a class="WG1" href="http://www.facebook.com/WidgetGenerators" title='Like Us'></a>

<style> .WG2 {  display: block;  width: 64px;  height: 64px;  background: url('https://blogger.googleusercontent.com/img/b/R29vZ2xl/AVvXsEgsG-2wbr_sKeDvMwlo7cG8x-OaSf0kPMgqSFNCOCCK2YNmNrOo8sPqEsFOG5_PDEkExFvsdvrkhFJEM38SUHkRrLHyRBVSoAWOI2e8ocIo90dA6RqkwljBYryikuc7_h6dLhF2I9qHlh5A/s1600/Twitter+Icon.png') bottom;  text-indent: -99999px; } .WG2:hover {         background: url('https://blogger.googleusercontent.com/img/b/R29vZ2xl/AVvXsEia3SM98CJ1ZayPdFniBV5Sboonwp_r1ya93hLX-iGLChW7hZjoMGGV_hNv81wiNuVhGLQj5KY_mURrPgG_SHFA8XbKKfX6c3DpsNW4fxmg0JYJc7aNAkeGEhHG6JACbOaynhdNvZ3jIVyW/s1600/Twitter+Rollout+Image.png') bottom; height: 64px; } </style> <a class="WG2" href="http://www.twitter.com/WidgetGenerator" title='Follow Us'></a>

<style> .WG3 {  display: block;  width: 64px;  height: 64px;  background: url('https://blogger.googleusercontent.com/img/b/R29vZ2xl/AVvXsEjZNOFL-LRILHUsQN5PaV0VTium0gQXsTLaUARglcqFJBCW3YW65JlahObS4U6WXWs2Q3SrKHhgl916vU3siUVXYAN6iFOVsBe-WbtAaqP26KqrBOY5_YutGqGYouBcvFjMMg7e95ps0sn9/s1600/Feedburner+Icon.png') bottom;  text-indent: -99999px; } .WG3:hover {         background: url('https://blogger.googleusercontent.com/img/b/R29vZ2xl/AVvXsEibuTIAhnnur4_cNz3tuBtQiBdnd-XuZu4tPqRpoxdNxrA7FdpqQ-ID3OSSSxcC9Z4QPW1K_EPHbwHbfz0H3PmAhc_samF2EM6CYR2Kl7Jk8BlWZ5yaVe0IUgAU7ljWnmXEl8F9dM5ycLuj/s1600/Feedburner+Rollout+Image.png') bottom; height: 64px; } </style> <a class="WG3" href="http://feeds.feedburner.com/WidgetGenerators" title='Subscribe Us'></a>

<style> .WG4 {  display: block;  width: 64px;  height: 64px;  background: url('https://blogger.googleusercontent.com/img/b/R29vZ2xl/AVvXsEgzk54LrGRP0cyCh2R6g7wFrTykqlAgYNKkr4FrvoLVIw1FihhZbLPdGMhW1N0-sBR4XKRg88GT5RTJ_XnI3494shozb-lR6nlK4ZwzShsZC5xM1-2klg3Gdv28nm8JRIffhgoWWUOTj5GB/s1600/Google+Icon.png') bottom;  text-indent: -99999px; } .WG4:hover {         background: url('https://blogger.googleusercontent.com/img/b/R29vZ2xl/AVvXsEjvUIgscQWPxON2ZdVlvWBHj4VLQaHZ9gaPGkUF0yfMVb-lRSf32WrvRe2RsYcc60Vje9vzB2ooyZ_o5m4W29GqWF8nfRgb0UldVT5o8IaD3JmEsnU2vJLz6LHvFpmQZJ_8zy8ZSEvL9nNf/s1600/Google+Rollout+Image.png') bottom; height: 64px; } </style> <a class="WG4" href="https://plus.google.com/107877224551351252870" title='Add in Circle'></a>
</div>
<!-- 3D Social Buttons by www.widgetgenerators.blogspot.com -->

  • Now Save your Widget and You are done.


Customize it

  • If you want to fix this template on left side then replace this text right with left.


Make Changes....!

  • Replace this http://www.facebook.com/WidgetGenerators with your Facebook Fan Page User name.
  • Replace this http://www.twitter.com/WidgetGenerator with your twitter user name.
  • Replace this http://feeds.feedburner.com/WidgetGenerators with your RSS Subscription user name.
  • Replace this https://plus.google.com/107877224551351252870 with your Google+ User name.  


If Any Problem Comes, Ask in Comments

Friday, November 23, 2012

Show HTML and Other Codes With Code Language Name


Show HTML and Other Codes in blogger, Now this is new and updated widget with tutorials of blogger where you can show your codes in blogger with coding language name like jQuery, HTML, CSS, JavaScript etc, this tutorial is very simple and very highly customize with CSS Codes. It's a very Pro widget be'coz it include the orange bar where you can mention the code name with your site name. This widget is highly customize with many kinds of sensitive codes and made by the CSS only no javascript  is used in it, so you can easily install it and it works very awesome.


Installation of Widget

  • Login to Blogger > Dashborad
  • Click on Drop Down Menu and select Template
  • Backup your Template before making any changes to your blog
  • Now Click on Edit HTML > Proceed > Expand Widget Templates
  • Press Ctrl + F and search the code shown below.

]]></b:skin>

  • Paste  below before ]]></b:skin> 
 
/*------Codes By www.widgetgenerators.blogspot.com------*/
pre{
position:relative;
background:#333;
color:white;
font-family:Monaco, Courier, MonoSpace;line-height:1.8;-moz-border-radius:8px;-webkit-border-radius:8px;border-radius:8px;font-size:12px;padding:10px;margin:0 0 25px 0;overflow:auto}pre code{padding:0;color:white;background:#333;white-space:pre
}
pre[rel]{padding-top:40px}pre[rel]:after{content:attr(rel);position:absolute;top:0;background:#F3A01E;padding:4px;left:0;right:0;font-size:36px;line-height:0;color:white;font:bold 20px "myriad-pro-1",Verdana;
/*------Codes By www.widgetgenerators.blogspot.com------*/
 

  • Now Save Your Template.


How to Add it in post?

  • After adding the CSS part 
  • Go to Posting > Edit HTML
  • Paste below code where you want to show the HTML CSS and others codes.
<pre class="lang-js" rel="HTML Codes By www.widgetgenerators.blogspot.com"><code><p>Write Your Codes Here
</code></pre>


Make Changes....!

  • Replace it HTML Codes By www.widgetgenerators.blogspot.com with coding language and with your site URL.
  • Replace Write Your Codes Here it with your codes.


If Any Problem Comes, Ask in Comments


Thursday, November 22, 2012

Sliding In-Out Pro Social Sharing Widget


Social Sharing Widget is more easy to use with using the generators but this widget is very different from others be'coz it's a Sliding In-Out Social Sharing Widget which will embed at the bottom of your blog and you can easily use Slide IN OR OUT by clicking on it via mouse. It includes the 3D effect of social sharing button. This is pure CSS and HTML based widget no javascript no other codes used, so it will be easy to install and easy to use, and there will not come any installing problem because you are using the generator of this widget, after also will not come any problem after installation.


Also Read-  Sliding In-Out Pro Social Sharing Widget Pack

1. Sliding In-Out Pro Social Sharing Widget


Add Sliding In-Out Pro Social Sharing Widget

  • Login to Blogger 
  • Fill the details in below generator.
  • Click on Add to Blogger Button
  • Your Widget will add automatically.


If Any Problem Comes, Ask in Comments

How to Improve Your Search in Google by Blog Title


We all want to optimize our blog's searching in search engines like Google, Bing, Yahoo etc. there are several many tricks to get the top searching results and some peoples or companies buy the services in many dollars which is given by web designing companies but as i'm a student and can't buy the services for blog, so we are given a very easy and free way to optimize your blog's searching on the top of the search engines via your blog title.


Like Below (Blog Title After Post Title)


What are we doing?

            We are making your post titles appear ahead of your blog title in search results, as people will be searching for keywords and phrases in your posts rather than on your home page this is almost a Must change.


Let's do it now....

  • Login to Blogger > Dashborad
  • Click on Drop Down Menu and select Template
  • Backup your Template before making any changes to your blog
  • Now Click on Edit HTML > Proceed > Expand Widget Templates
  • Press Ctrl + F and search the code shown below.

<title><data:blog.pagetitle/></title>

  •  Now replace this code with below code.
<b:if cond='data:blog.pageType == &quot;index&quot;'>
<title><data:blog.title/></title>
<b:else/>
<title><data:blog.pageName/> | <data:blog.title/></title>
</b:if>

  • Now Save Your Template and You are done.


If Any Problem Comes, Ask in Comments

Wednesday, November 21, 2012

Blank Blogger Template OR Blank HTML Page


When we install any template in the blogger so many times we thinks that is it possible to have a blogger template like a blank html page, if it is possible then we can easily make own templates according to us and also can publish the static pages like we do in html, so that would be free of cost totally, and which will be helpful to us and also helpful to our bloggers. I know this post was already posted by Mohammad but we also tried this one with own efforts and after some little kind problems we done it successfully.


Install Blank Blogger Template

  • Login to Blogger > Dashboard
  • Create a New Blog > Select Simple Blogger Template
  • Click on Drop Down Menu and select Template
  • Now Click on Edit HTML > Proceed.
  • Delete all codes and paste below codes of Blank Blogger Templates

<?xml version="1.0" encoding="UTF-8" ?>
<!DOCTYPE html>
<html b:version='2' class='v2' expr:dir='data:blog.languageDirection' xmlns='http://www.w3.org/1999/xhtml' xmlns:b='http://www.google.com/2005/gml/b' xmlns:data='http://www.google.com/2005/gml/data' xmlns:expr='http://www.google.com/2005/gml/expr'>
  <head>
    <meta content='IE=EmulateIE7' http-equiv='X-UA-Compatible'/>
    <b:if cond='data:blog.isMobile'>
      <meta content='width=device-width,initial-scale=1.0,minimum-scale=1.0,maximum-scale=1.0' name='viewport'/>
    <b:else/>
      <meta content='width=1100' name='viewport'/>
    </b:if>
    <b:include data='blog' name='all-head-content'/>
    <title><data:blog.pageTitle/></title>

    <b:skin><![CDATA[/*
-----------------------------------------------
Blank Blogger Template by Rose 91481
Name:        Blank Blogger Template
Designer:        Rose
URL:        http://widgetgenerators.blogspot.com
Get This:     http://widgetgenerators.blogspot.com/2012/11/blank-blogger-template-or-blank-html.html
----------------------------------------------- */


]]></b:skin>

  
  </head>

  <body>
  <b:section class='navbar' id='navbar' maxwidgets='1' showaddelement='no'>
<b:widget id='Navbar1' locked='true' title='Navbar' type='Navbar'/>
</b:section>


<div style='margin-top:700px; '>
<br/>
<center><b><font color='#ffffff'>&#169; All Rights Resrved by <a href='http://www.widgetgenerators.blogspot.com' style="color: #ffffff">Widget Generators</a> 2012.</font></b></center>
</div>
  
</body>

</html>

  • Now click  on Save Template and this kind of error will show (see below)
  • then, Click on delete button.
Warning: Your new template does not include the following widgets:

BlogArchive1 Profile1 Attribution1 Header1 Blog1


When You See the Layout of this template, It will be Blank and only it will show only the Favicon


Customize Your Template in Own Style

  • Add your Meta tags/JavaScripts/ links etc. in between <head> ... </head>
  • Add your CSS codes to style your page in between <b:skin><![CDATA[ ... ]]></b:skin>
  • Add your showing content which will show in your page in between <body> ... </body>


You can also download this template


What is this all?

BlogSpot templates are codded using the XHTML 1.0 Strict Document Type. It was developed by world wide web consortium on 26 January 2000. Unlike PHP or ASP.net the rules of XML are strict and unforgiving. A slight mistake in code results in terrifying error messages that you often see while editing your blog template. In order to understand how these templates are designed and programmed. You need to start from scratch. The entire blogger template consists of widgets that are operated and managed using classes and IDs. The blog posts section itself is a giant widget that can be styled in different ways.


Enjoy This Post


If Any Problem Comes, Ask in Comments

    Monday, November 19, 2012

    How to Remove Date Ribbon From Blogger Dynamic Views


    As we all know that Blogger Dynamic Views has many things in bloggers but as we can customize the blogger template according to us and any thing can easily hide or show, similarly we can easily now customize the Dynamic Views of Blogger and today we starts from the How to Remove Date From Blogger Dynamic Views. As Blogger Dynamic Views like by some body and also not be'coz some thing is limited in it but many kinds of new features also available, but anyone can also customize it.


    Remove Date From Blogger Dynamic Views

    • Login to Blogger > Dashboard
    • Click on Drop Down Menu and select Template
    • Now Click on Customize > Advanced > Add CSS
    • Paste below code in it.

    .ribbon{
    display: none !important;
    }

    • Click on Apply Button.


    If Any Problem Comes, Ask in Comments


    Sunday, November 18, 2012

    Blogger VS Wordpress


    As we all know that many companies provide free blogging services like Tumbler, Blogger, Wordpress etc. but as we all know that Blogger and Wordpress is most top blogging service provider but when a newbie decide to start a blog and when she/he thinks about the Blogger and Wordpress the she/he would be confuse   in between them so we are here to make difference in Blogger and Wordpress.


    Difference in Blogger and Wordpress


    Which is better according to us?

    • Blogger and Wordpress has their own limitations.
    • We can't say which is better but if you can spend money first then you can go with wordpress
    • If you want to learn first then we highly recommend Blogger.


    If Any Problem Comes, Ask in Comments

    Friday, November 16, 2012

    New Professional Shining Download Buttons for Blogger


    Collection of Professional Shining Buttons with three different categories like Beveled Buttons, Chrome Butttons, Flat Buttons, Glass Buttons with a new Glossy and HD feel which is totally look like a Professional Look.


    It has total 50 different buttons 

    Its time to get rid of the Download Text and replace it with a cool, stylish, professional and most importantly with an animated Shining HD Button. With four different styles and versions in it.


    Download


    If Any Problem Comes, Ask in Comments


    Monday, November 12, 2012

    Add a Diwali Wishing Widget to Blogger


    As the festival of Diwali we want to introduce the new and simple and professional Diwali Wishing Widget for Blogger it's very awesome work like a Blinking text and also have a close button, if any visitor don't want to see that notification the easily you can close it and it's very easy to install in blogger, and it a very quality and good widget for blogger you could say it as Diwali Gift :)


    Add Diwali Wishing Widget to Blogger

    • Login to Blogger > Dashboard
    • Now Go to Layout > Click on Add a Gadget
    • Select HTML/JavaScript Widget.
    • Paste below code in it.


    <style>
    /*--Widget by www.widgetgenerators.blogspot.com--*/
    #announcement{
    width: auto;
    font:bold 15px Trebuchet MS;
    border: 2px solid #FF0000;
    border-radius: 20px;
    margin: 0 40px 5px 40px;
    text-align: center;
    padding:15px 10px 15px 70px;
    background-repeat: no-repeat;
    background-position: 10px center;
    position:relative;
    color: #FF0000;
    background-color: #F9EAD4;
    background-image: url('http://cdn3.iconfinder.com/data/icons/humano2/48x48/apps/kblogger.png');
    }
    </style>
    <script src='http://code.jquery.com/jquery-1.2.3.min.js' type='text/javascript'>
    </script>
    <script type='text/javascript'>
    $(document).ready(function(){
    $(".close").click(function(){
    $("#announcement").remove();
    });
    $("#announcement").fadeOut(800).fadeIn(800)
    .fadeOut(400).fadeIn(400)

    .fadeOut(400).fadeIn(400);
    });

    </script>
    <div id='announcement'>
    <a class='close' href='#close' style='float: right;'><img border='0' src='http://cdn1.iconfinder.com/data/icons/nuvola2/16x16/actions/button_cancel.png'/></a>
    <center>
    Wish You a Very Happy Diwali to All the Visitors and Their Family.
    </center></div>


    • Save  Your Widget.


    Make Changes....!

    • Replace this text Wish You a Very Happy Diwali to All the Visitors and Their Family. from your own text. (Optional)


        If Any Problem Comes, Ask in Comments